Saturday, July 8, 2017

Amount of water for plants - 1 tablespoon (15 ml) a day


How much water do plants need a day?
How often do I need to water plants?


Plant Height                            Amount of Water per day                                    
Up to 6 inches   -------------      1 tablespoon or 15 ml
6-12 inches   -----------------      2 tablespoons or 30 ml
12-18 inches  ----------------      3 tablespoons or 45 ml
18-24 inches  ----------------      4 tablespoons or 60 ml
every 6 inch increase in height --- add 1 tablespoon


Rule of Thumb:
amount of water for plants --- 1 tablespoon ( 15 ml ) a day


Example: 
Given a plant that is 3 inches high,
If your watering period frequency is every 3 days: 
1 tables spoon/day  x  3 days
3 table spoons every 3 days  ----- amount of water needed

Friday, March 20, 2015

Example of Home Selling Profit Calculation


PURCHASE

Year house bought: 2005
House buying price: $ 500,000
Downpayment (20%): $ 100,000
Mortgage amount: $ 400, 000
Mortgage term: 30 years


SELL
Year home sold (10 years after purchase): 2015
Home selling price: $600,000
Total mortgage payments to the Principal after 10 years: $ 60,000 
Market value increase: $600,000 - $500,000 = $ 100,000


EQUITY


Equity Quick Calculation:

Total Equity = Down Payment + Market Value Increase + Mortgage Payments
Total Equity = $ 100,000  +  $ 100,000  +  $ 60,000
Total Equity = $ 260,000


SELLING COSTS


Breakdown of the Total Cost of Selling Home (8%):
 a. Sales commissions (6%): $ 36,000
 b. Title and escrow fees (1.5%): $ 9,000
 c. Property marketing preparation costs (0.5%): $ 3,000
 d. Renovation costs: $ 12,000

Total Cost of Selling Home = $ 36,000  +  $ 9,000  +  $ 3,000  +  $ 12,000

Total Cost of Selling Home = $ 60,000


NET PROFIT


Total Profit Calculation:

Total Profit = Market Value Increase - Total Cost of Selling Home

Total Profit = $ 100,000  -  $ 60,000

Total Profit = $ 40,000


YEARLY PROFIT


Yearly Profit = Total Profit / 10 years

Yearly Profit = $ 40,000 / 10

Yearly Profit = $ 4,000


MONTHLY PROFIT


Monthly Profit = Yearly Profit / 12

Monthly Profit = $ 4,000 / 12

Monthly Profit = $ 333


--------------------------------------------------------------------------


RENTING for 10 YEARS & SAVING $2000 per month


Yearly Savings = $ 2,000 x 12

Yearly Savings = $ 24,000

Total Savings for 10 years = $ 24,000 x 10

Total Savings for 10 years = $ 240,000


COMPARISON: BUYING HOUSE or RENTING & SAVING


In order to match the $ 240,000 total savings on renting for 10 years,
the market value of the house after 10 years must be 60% greater than the original purchase price.

Calculation Proving:

60% Market value increase after 10 years:


Market value = $ 500,000  x  1.6

Market value = $ 800,000


Market value increase:


Market value increase = $ 800,000  -  $ 500,000

Market value increase = $ 300,000


Net Profit:

Total Profit Calculation:

Total Profit = Market Value Increase - Total Cost of Selling Home

Total Profit = $ 300,000  -  $ 60,000

Total Profit = $ 240,000


Return on Investment (ROI):


ROI = Total Profit / Original Price

ROI = $ 240,000 / $ 500,000

ROI = 48 %


Conclusion:

In order to match the $ 240,000 total savings on renting for 10 years,
the ROI on buying and selling a house must be 48%.

Sunday, March 8, 2015

How long to boil 1 Liter of water in 1500 watts kettle

Solution:

Cp = 4.19 KJ/(kg·C)
This is the specific heat of water at 15 °C and 101.325 kPa atmospheric pressure.
This is the amount of energy required to raise the temperature of  1 kg  ( 1 Liter )  of water by 1 °C.

Density of water:

1 kg/Liter
1000 kg/cubic meter
1 metric ton/cubic meter
1 g/cubic centimeter
1 g/ml


Boiling water for coffee/tea:

1 Liter is approximately 4 cups (good for a family of four)
100 °C is the boiling point of water at a pressure of 1 atm (101.325 kPa)


Temperature of cold tap water and hot water:

cold tap water is around 15 °C
in most homes, hot water heaters are set at 60 °C (140 °F)


Heat Calculation Formula:


Q = m x Cp x (T2-T1)

where:
Q = heat energy required to boil water, KJ
m = mass of water, kg
Cp = specific heat of water, 4.19 KJ/(kg·C)
T2 = boiling point of water, 100 C
T1 = temperature of cold tap water, 15 C

Q = 1 kg x 4.19 KJ/(kg·C) x (100 C - 15 C)

Q = 357 KJ


Black and Decker Kettle Power Rating:

1500 watts heating power
1500 watts is equal to 1.5 KW (KJ/sec)


Time to boil 1 Liter (1 kg) of water from 15 C:


assuming no heat is lost,

time = Q/Power of kettle

time = 357 KJ/1.5 KJ per second

time = 238 seconds

time = 4 minutes


Note: under the same conditions,

a. boiling 2 Liters of water would double the time to boil --> 8 minutes
b. using twice the kettle power (3000 watts) requires only half the boiling time --> 2 minutes

 
Time to raise 1 Liter of water 1 degree Celsius


using the same 1500-watt kettle, and assuming no heat loss

Q = 1 kg x 4.19 KJ/(kg·C) x (1 C)

Q = 4.19 KJ


time = 4.19 KJ/1.5 KJ per second

time = 3 sec


Note:

The time required to raise the temperature of water 1 degree C is dependent on,
a. amount (mass) of water
b. power rating of kettle

Saturday, October 25, 2014

Current draw of 1500 watts electric water kettle


Appliance data:

Black & Decker electric water kettle
Model # KE1517SC
1.7 Liter (7 cups) Capacity
1500 Watts of power
120 Volts, 16 AWG power cord


How to calculate current draw of 1500 watts electric water kettle

Formula:


Power = Volts x Amperes

Power = Voltage x Current

Current = Power/Voltage


Using 220 volts of power:


Current = 1500 watts/220 volts

Current = 7 amperes


Using 110 volts of power:

Current = 1500 watts/110 volts

Current = 14 amps


Conclusion:


Current consumption is doubled using 110 volts

Boiling time for water is the same either 110 or 220 volts is used, because both uses 1500 watts

Boils water faster than a microwave

Boiling time at full capacity is approx. 5 minutes

Friday, October 17, 2014

How long 18v 3Ah lithium ion drill battery last until recharge


Given data:
DEWALT 1/4 inch, 18 volt
Cordless Drill Driver ($100 price)
Average Power consumption: 250 watts
Ave. Amperage/Current draw: 7 Amperes
No Load Speed: 0-4,000 RPM
Chuck Size: 1/4 inch (6mm)
Gear Reduction: Single
Maximum Torque: 1300 in-lbs (150 Nm)
Power Source: 18v 3Ah Lithium Ion battery
Battery Recharge time: 30 minutes


Calculation of Running Time:

(Example: Carpentry, Home Project Renovation)

If I use this power drill to drive 2 inch screws in wood,
how long does the 18 volt, 3 ampere hour capacity
Li Ion battery last until my next recharge?

Total Available Energy at full charge = 3 ampere hour = 180 ampere minutes

Average time to drive one 2 inch screw in wood: 3 seconds (0.05 minutes)

Average Energy used to drive one 2 inch screw = 7 ampere x .05 minutes = 0.35 Amp min

Battery Run Time = 180/0.35 =  500 minutes = 8 hours


Notes:
Recharge the battery after 8 hours of total usage
This calculation is based on drill being used on 2 inch screws only
Battery will last longer or shorter depending on load and application
The harder the task (bigger screws, harder wood, etc.),
the more current draw, the more power consumption,
the more energy required,
the lesser the battery life before the next recharge

Monday, September 29, 2014

Monthly Mortgage Payments - estimate Canada


Example data:

Downpayment = 5%
Interest/Mortgage rate = 4.5%
Private Mortgage Insurance (PMI) = 0.52%

Mortgage term = 5 years
Amortization term = 25 years

Property Tax = $3,000 per year
Property Insurance = $1500 per year


Note:
1. Mortgage, Property tax, Property insurance and PMI will increase with an increase in House Price (Mortgage Amount).
2. Figures below are for estimate and example purposes only.


Canada Home Total Monthly payment = Mortgage 

                                                                  + Property tax 
                                                                  + Property insurance
                                                                  + PMI


Home Price ---  Home Total Monthly Payment (approximate)


$300,000 --------- $2,100

$350,000 --------- $2,400

$400,000 --------- $2,700


$450,000 --------- $3,000  *** *** *** *** *** ***


$500,000 --------- $3,300

$550,000 --------- $3,600

$600,000 --------- $3,900


Observation:
For every
$50,000 increase in property price,
$300 is added to your total monthly home payment.


Tuesday, September 2, 2014

Comox Valley - Affordable homes, Temperate climate


Comox Valley city, town, village & communities:

Courtenay city
Comox town
Cumberland village
Royston
Union Bay
Fanny Bay
Black Creek
Merville
Denman Island
Hornby Island


Location Description
:

- temperate climate
- Comox town's summer temperatures average 22C (72F)
- dry, sunny summers
- Comox town's winter temperatures rarely fall below freezing
- mild, wet winters
- Comox annual precipitation averages 1,179 mm (46.42 in)
- Precipitation (mainly rain) occurs October to March

- rural, town, village living
- less expensive housing prices (British Columbia's most affordable)
- affordable, moderate cost of living
- modern amenities & facilities:
   Airport
   Hospital
   Shopping malls
   Stores


Grocery Stores:
   Valley Asian Foods chinese grocery - 526 Cliffe Ave, Courtenay, BC, V9N 2J4
   Quality Foods Comox - 2275 Guthrie Road, Comox, BCV9M 4A6
   Quality Foods Courtenay - 1002-2751 Cliffe Ave, Courtenay, BCV9N 2L8
   Thrifty Foods - 660 England Avenue, Courtenay, BCV9N 2N4
   Edible Island Whole Foods Market - 477 6th Street, Courtenay, BCV9N 1M4
   Seeds Food Market, Inc. - 2733A Dunsmuir Ave, Cumberland, BCV0R 1S0


Chinese Restaurants:

  Dynasty Chinese Buffet - 1320 Cliffe Avenue Courtenay, BC V9N2K4
  Golden Carriage Restaurant - 4788 5th Street Courtenay, BC V9N
  Lo's Garden - 430 Old Island Highway Courtenay, BC V9N3P4
  Mandarin Village Restaurant - 5 Street Courtenay, BC V9N1J5

Canadian Tire - 278 Old Island Hwy, Courtenay, BC V9N 3P1

Walmart - 3199 Cliffe Avenue, Courtenay, BC V9N 2L9

Costco - 588 Crown Isle Blvd, Courtenay, BC V9N 0A6

Tim Hortons - 789 Ryan Rd, Courtenay, BC V9N 3R6
Tim Hortons - 2451 Cliffe Ave, Courtenay, BC V9N 2L5
Tim Hortons - 394 Lerwick Rd, Courtenay, BC V9N 2Z4

McDonalds - 1799 Cliffe Ave, Courtenay, BC V9N 2K7
McDonalds - 3199 Cliffe Ave, Courtenay, BC V9N 2L9
McDonalds - 727 Anderton Rd, Comox, BC V9M 3Y6


Friday, August 8, 2014

BUYING HOME: Mortgages Basic Knowledge


PAYMENT FREQUENCY:
Semi-monthly = 24 payments per year
Accelerated bi-weekly = 26 payments per year
Accelerated weekly = 52 payments per year

Savings through Accelerated Payments:
* A shorter Amortization Term saves you money because you will pay less interest costs over the life of the mortgage.
* Save thousands of dollars in interest costs - while paying down your mortgage sooner!
Example:
  - save over $62,000 by paying $1,454 Accelerated Bi-weekly for 21 years
  - save over $63,000 by paying $727 Accelerated Weekly for 21 years   
  - no savings by paying $2,908 monthly for 25 years

Basis for Example:
Mortgage Amount: $500,000.00
Interest Rate Type: Fixed
Payment Amount: $2,908.03
Payment Frequency: Monthly
Amortization Period: 25 years
Interest Term: 5 years
Interest Rate: 5%


INTEREST COSTS:
Term Interest Cost = interest cost on a loan for a specified term (e.g. total interest at 4% fixed rate for 5 year term mortage)

Amortization Interest Cost = total interest cost of the loan for the whole amortization period (e.g. total interest for the entire 25 year amortization period)


VARIABLE INTEREST RATES
Variable Interest Rate = interest rates can change during the mortgage term depending on changes in market interest rates (bank’s prime lending rate)

Advantages of variable interest rate mortgages:
- interest rates on variable rate mortgages are often lower than fixed interest rate mortgages

Disadvantages of variable interest rate mortgages:

- unknown future, difficult to predict, changes with the politics, global news, war, etc.
- between 2000 and 2009, the Bank of Canada bank rate changed from 0.5% to 6%


FIXED RATE MORTGAGES
- interest rate is constant throughout the term (e.g. fixed 4% interest rate over the entire 5 year term)


CLOSED MORTGAGE

- fixed term mortgage

Advantages of Closed Mortgage:
- interest rates are generally lower than for open term mortgages
- savings on interest costs
- payoff your mortgage faster

Disadvantages of Closed Mortgage:
- prepayment charge if you renegotiate your interest rate
- prepayment charge if you prepay more than what is allowable


CONVERTIBLE CLOSED MORTGAGE

- same benefits as a closed mortgage, but can be converted to a longer, closed term at any time without prepayment charges


OPEN MORTGAGE
- open term mortgage

Advantages of Open Mortgage:
- sound decision if you are planning to pay off your mortgage in the short term (10 years or less)
- can be repaid either in part or in full, at any time, without prepayment charges
- can be converted to any other term, at any time, without prepayment charges

Disadvantages of Open Mortgage:
- interest rates are generally higher than closed mortgages because of the added pre-payment flexibility


FIXED MORTGAGE RATES (Aug 2014)
Convertible:
 
6 Month   3.140% 

Closed:
1 Year     3.140%
2 Year     3.040%     (can i get 2 year mortgage contract??, almost same as prime rate)
3 Year     3.750%
4 Year     4.540%    
5 Year     4.940%    
7 Year     5.750%
10 Year     6.750%    
25 Year     8.750%    

Open:
6 month     6.300%
1 year     6.300%


VARIABLE MORTGAGE RATES (Aug 2014)

Closed:
5 year     RBC Prime Rate + 0.000% ---> 3.030%
(based on today's Royal Bank of Canada Prime Rate of 3.000%)     

Open:
5 year     RBC Prime Rate + 1.000% ---> 4.030%
(based on today's Royal Bank of Canada Prime Rate of 3.000%)

      
Today's Royal Bank of Canada Prime Rate (08 August 2014):

RBC Prime Rate     3.000%
Date of change: 09 Sept 2010 
(subject to change without notice, at any time)

*** Rates are applicable to residential mortgages only


MY MORTGAGE PREFERENCE:
Closed Mortage --> 25 years amortization
Variable Interest Rate --> 3% Prime Rate  ---> get 2 year fixed rate @ 3.040% ??
Accelerated Weekly --> save over $63,000 by paying $727 for 21 years     


500 K, 3% variable, 5 yr, closed mortgage, 25 yr amortization
 

500 K, 5% fixed, 5 yr, closed mortgage, 25 yr amortization

 
500 K, 5% fixed, 5 yr, closed mortgage, 25 yr amortization -FCAC
 

500 K, 5% fixed, 5 yr, closed mortgage, 25 yr amortization --FCAC

 
400 K, 5% fixed, 5 yr, closed mortgage, 25 yr amortization -FCAC


400 K, 5% fixed, 5 yr, closed mortgage, 25 yr amortization --FCAC


700 K, 5% fixed, 5 yr, closed mortgage, 25 yr amortization


700 K, 5%, 5 yr, closed mortgage, 25 yr amortization -FCAC


700 K, 5%, 5 yr, closed mortgage, 25 yr amortization -FCAC
  

Mortgage Rates, 08 Aug 2014


Canada Prime Interest Rates 2004-2014

 
Canada Prime Interest Rates 1960-2014


References:
https://www.rbcroyalbank.com/cgi-bin/mortgage/mpc/start.cgi
http://www.rbcroyalbank.com/rates/prime.html
http://www.rbcroyalbank.com/mortgages/mortgage-rates.html
http://www.fcac-acfc.gc.ca/eng/resources/publications/mortgages/Pages/Understa-Comprend-0.aspx#attractive
http://itools-ioutils.fcac-acfc.gc.ca/MC-CH/MC-CH-eng.aspx


Friday, July 25, 2014

Home Search Criteria - point2homes


Website:
http://www.point2homes.com/CA/Real-Estate-Listings/BC/Vancouver-Island.html


Home Search Criteria:
  • $500 to 600 thousand dollars
  • Single family home property
  • 0.3 acre (1200 sqm, 12,000 sqft) minimum lot size
  • 4 bedrooms, 3 bathrooms minimum
  • Less than 1 hour drive from Victoria, BC
  • Less than 60 km from Victoria, BC


Locations, Driving Distance and Time:

C
Central Saanich
Cherry Point -- 50 km, 43 min
Cobble Hill -- 48 km, 41 min
Colwood
Cowichan Bay -- 54 km, 46 min

D
Duncan -- 60 km, 50 min

E
Esquimalt

H
Highlands

L
Langford

M
Malahat
Metchosin
Mill Bay -- 42 km, 37 min

N
North Cowichan -- 69 km, 59 min
North Saanich

O
Oak Bay

S
Saanich
Shawnigan Lake -- 44 km, 43 min
Sidney
Sooke -- 39 km, 42 min

V
Victoria
View Royal


Friday, January 3, 2014

How to Add Value to Laundry Card


1. Insert Laundry card in the machine

2. Look at the options:
   a.  F1 = $10
   b.  F2 = $25
   c.  F3 = Other

3. Select Other
    Note:
    a. The maximum value in the Laundry card after the addition is $99
    b. Example: If your current balance in the Laundry card is $7, you can add up to $92

4. Enter the amount you want to add, but not exceeding the limit of $99 total (after the added amount)

5. Select Debit

6. Swipe your Bank card

7. Choose CHK

8. Enter you PIN

9. Press OK

10. Select YES to get Printed Receipt

11. The display will say DIALING...CONNECTED, DO NOT REMOVE CARD

12. When you see APPROVED, remove your Laundry card

13. Get the receipt

14. Check the receipt for correct amounts and keep it for your records in case of discrepancies.

Note:
This procedure is based on a Phelps Laundry Machine


Tuesday, July 16, 2013

Main Electrical Panel Circuit Breaker (2 bedroom)


Note:
The data below is for a 2-bedroom apartment. It serves as a reference point. For a 4-bedroom house, estimate can be made based on the values of this reference point.


Main Electrical Panel specifications:
125 AMPS max
24 CIRCUITS max
120/240 VAC
1 PHASE
2 POLE CIRCUIT BREAKER


Left of Panel:
60 A
60 A
15 A --- Dining
15 A --- Kitchen countertop plug
15 A --- Living Room, Lights & Plugs
15 A --- Bedroom1 plugs
15 A --- Bedroom2 plugs

Right of Panel:
15 A --- Hallway lights
15 A --- Fridge
40 A --- Range (Electric Stove)
40 A --- Range (Electric Stove), #8 AWG copper wire

Monday, July 15, 2013

How to compute your monthly Power Consumption (Electric Bill)


The following computation is based on a 2-bedroom apartment with typical home appliances. The total cost does not include heating costs, air-conditioning costs and other relevant costs. The total monthly hours of usage are approximate values of daily usage multiplied by 30. This power computation (wattage) is only based on the home appliances listed here. The purpose of this article is to show a basic and simple way to calculate for your monthly electric bill.

The cost of power is based on:

a] 120V/240V, 60 Hz
b] Basic charge ---> 15 cents/day
c] KW-hr cost ----> 5 cents/kw-hr  
d] Taxes ---> 7%

e] Power Formula:

    Power = Volts x Amps


Power Computation example:

given:
120 volts
10 amperes

Power = voltage x current
Power = volts x amps
Power = 120 x 10
Power = 1200 watts
Power = 1.2 Kilowatts (KW)


Power consumption of home appliances:


1. Electric Stove (Range, Oven)
- 12,000 watts
- 240V, 60 Hz, #8 AWG (typical code minimum #10 AWG copper wire), Circuit Breaker 40 AMPS


2. Rice cooker
- 400 watts


3. Microwave
- 1350 watts


4. Bread toaster
- 1500 watts


5. Kettle
- 1500 watts


6. Refrigerator (fridge)
- 600 watts
- 20 cu. ft (cubic feet) capacity


7. TV
- 180 watts
- 120 V, 1.5 A
- 120 x 1.5 = 180


8. Radio
- 50 watts


9. Electric fan
- 60 watts
- 120 Volts  x  0.5 Amperes


10. Vacuum cleaner
- 360 watts
- 120V x 3A = 360 wattage


11. Iron
- 1200 watts
- 120 voltage x 10 amperage = 1200 wattage


12. Lighting
- 900 watts
- based on 15 light bulbs x 60 watts/light bulb
- 15 x 60 = 900


13. Laptop computer
- 65 watts


14. Printer-inkjet    
- 75 watts     


Monthly Energy Consumption of Home Appliances & Equipment:

------------------------------------------------------------------------------------ 

.

Energy Usage (Kilowatt-hour) ----- Appliance/Equipment

12 KW x 200 hrs = 2400 KW-hr ----- Electric Stove (Range, Oven)

1.5 KW x 5 hrs = 7.5 KW-hr ----- Bread toaster

1.5 KW x 5 hrs = 7.5 KW-hr ----- Kettle

1.35 KW x 5 hrs = 6.75 KW-hr ----- Microwave

1.2 KW x 5 hrs = 6 KW-hr ----- Iron

0.900 KW x 250 hrs = 225 KW-hr ----- Lighting

0.600 KW x 720 hrs = 432 KW-hr ----- Refrigerator (fridge)

0.400 KW x 30 hrs = 12 KW-hr ----- Rice cooker

0.360 KW x 2 hrs = 0.72 KW-hr ----- Vacuum cleaner

0.180 KW x 300 hrs = 54 KW-hr ----- TV

0.075 KW x 1 hour = 0.075 KW-hr ----- Printer-inkjet    

0.065 KW x 100 hrs = 6.5 KW-hr ----- Laptop computer

0.060 KW x 50 hours = 3 KW-hr ----- Electric fan

0.050 KW x 10 hours = 0.5 KW-hr ----- Radio

-----------------------------------------------------------------------------
Total Monthly Energy Usage = 3162 KW-hrs


Using the given data:

KW-hr cost = 5 cents/kw-hr  
Basic charge = 15 cents/day
Taxes = 7%


Total Monthly Electric Bill

= (Total Monthly Energy Usage x KW-hr cost) + Basic charge + Taxes
= (3162 KW-hr x $0.05/KW-hr) + ($0.15 x 30) + Taxes
= 158 + 4.5 + Taxes
= $162.50 + (0.07 x $162.50)
= $174    

Saturday, December 15, 2012

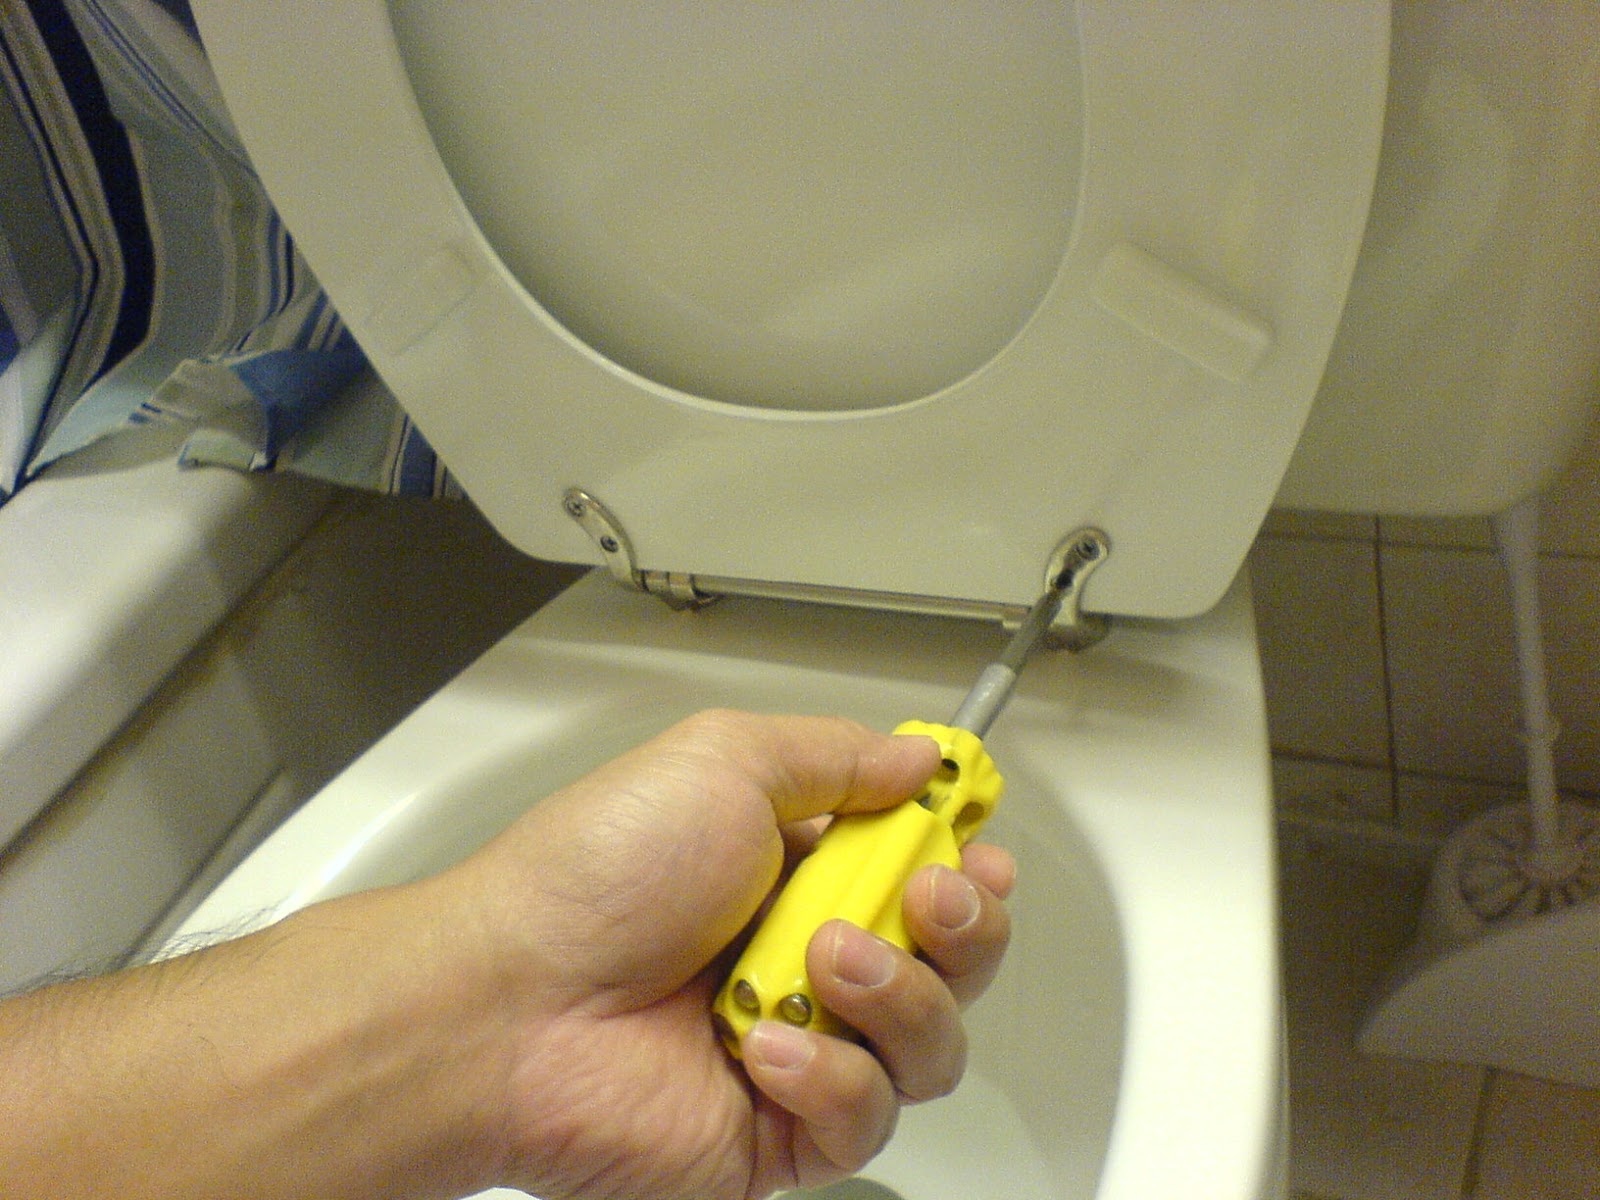
How to replace broken or damaged toilet seat and mount the new one


Broken or damaged toilet seats happen generally because of too much pressure, too much weight on the top of the toilet seat. Another possible reason is repeated "dropping" of the toilet seat as a result of not holding the seat while putting it down.

Below is a simple step by step procedure on how to replace your damaged or broken toilet seat and how to mount the new one.


Step by Step Procedure of replacing broken/damaged toilet seat:


1. Close the toilet cover. Open or remove the cover caps. In some models, there is no covering caps and you see the screw head right away.

2. Hold the bottom nut using a wrench or pliers then loosen the top screw using a Phillips (star) or flat screw driver depending on the screw head. If it is hard to loosen the nuts, you can spray some oil on the nuts, leave it for few minutes to penetrate and break the rust or dirt.

3. After removing the two screws, clean the dirt and stains from the old screw on top of the bowl.

4. Place the new toilet seat and position the two screws or bolts making sure the correct position of the washer. The washer should be placed with the flat side facing towards the bottom of the toilet bowl. Incorrect position of the washer may result in poor tightening or even breakage.

5. Tighten the bolts or screws using an appropriate screw driver while holding the bottom nut with your hand or with a wrench or with a plier as necessary.

Important: DO NOT OVERTIGHTEN THE NUTS. It may cause breaking of the toilet bowl including the hole for the bolt/screw. If the toilet seat shakes after several days or weeks, just re-tighten the nuts.

PICTURES:
                                                                   
Broken seat.

Tools needed.


Open caps.

Loosen two screws.
Clean dirt.
Clean before installing new seat.
Place new toilet seat.


Tighten two nuts with screw driver.
Tighten other screws inside.
Congrats! You have successfully installed your new toilet seat.

Tuesday, December 11, 2012

How to repair or replace a leaking or improper water splashing flow of a kitchen or lavatory sink faucet aerator


A leaking kitchen sink faucet aerator can be so uncomfortable while you are washing the dishes, washing the vegetables, fruits, or even a knife. Everytime you open the kitchen faucet, unnecessary splashing showers and even jets of water come out from a defective or dirty aerator. This can be caused by incorrect assembly of parts inside the aerator, broken circular  or ring screen, broken gasket, or a dirty aerator with debris blocking the flow of water, or any of the parts loose or damaged which causes it to malfunction and so affect the whole aerator assembly and thus causing it to leak or splash and producing an improper pattern of water flow.

A leaking lavatory faucet aerator on the other hand is as messy as a kitchen sink faucet aerator. When brushing your teeth and washing your mouth, the water flow can even splash or spatter right to your face and even your clothes, including the side tiles or even the bathroom floor. In any case, it is a mess and a discomfort.

Below is a simple procedure showing step by step instructions on how to repair a leaking or splashing kitchen sink or lavatory faucet aerator. The step by step procedure of replacing a defective or broken aerator is also discussed at the bottom.


How to repair a leaking or too much splashing of kitchen or lavatory sink faucet aerator:


1. Turn off both the hot and cold water faucet handles.

2. Using a monkey wrench or pliers, unscrew the aerator by turning it clockwise, loosen, and remove the aerator.

3. Check the component parts for any breakage, inspect any loosely fitted part in the assembly especially the black rubber circular or O-ring gasket and the small perforated (with many holes) circular screen for any dirt, debris, small grains of sand, etc.

4. If the aerator is dirty, clean all the parts removing even the stains. Fix any loose parts. Replace any broken part as necessary.

5. Assemble back the aerator component parts clean, snugly fitted, properly positioned in the correct order.

6. Put back the aerator assembly to the faucet by turning it counter-clockwise using your hands first, then tightening it using the money wrench or pliers.

7. Open the water handles to check the leak and water flow pattern. If the problem persists, follow the step by step procedure on how to replace a leaking, defective or broken kitchen sink or lavatory faucet aerator.


How to replace a leaking, defective or broken kitchen sink or lavatory faucet aerator:


1. Turn off both the hot and cold water faucet handles.

2. Using a monkey wrench or pliers, unscrew the aerator by turning it clockwise, loosen, and remove the aerator.

3. Screw into position the new faucet aerator by turning it counter-clockwise using your hands first, then tightening it using the money wrench or pliers.

4. Open the water handles to check the aerator if it is functioning properly and the water flow pattern is nice and smooth without any spatter or unwanted splashing showers and leaks.


Bathroom faucet with aerator.

Showing the aerator (with small openings) or perforations.


Sunday, December 9, 2012

How to repair bathtub or sink paint scratches, coating tears, black spots & refinish with resurfacing paint or touch up


A few years ago, a friend of mine spent more than $2000 dollars just for the replacement of her bathtub in the second floor bathroom. It started with a small 1/4 inch black spot which has been caused when an adjustable wrench fell down the bathtub while fixing the shower head. As a result, the bathtub paint was scratched and a paint coating the size of a small finger nail was torn down and thus producing the said quarter inch black spot. She did not repair it right away but left it as it is for several months until her daughter dropped a hard porcelain vase right on the same black spot on the bathtub. Unfortunately, this time the black spot turned into small black hole which caused leaking on the ground floor ceiling thereby producing those yellow water marks on the ground floor ceiling. This time she called a plumber to replace the bathtub costing her a lot of money because of the additional ceiling repair that has to be done.

If the small paint scratch has been fixed and refinished immediately with a resurfacing tub paint, this whole bathroom and ceiling expense could have been avoided. The good news is, fixing a tub scratch is as easy as painting your finger nails with a nail polish and another good news is that if the procedure of repainting your scratched tub is done properly, it could last for a few more years.

Below is the simple step by step procedure of re-painting a scratched tub:

1. Clean the scratched area.

2. Lightly sand the area, clean and make sure it is dry.

3. Before applying the touch up paint, shake it well.

4. Using the brush-in-cap, gently apply paint on the scratched area and leave it for at least half an hour.

5. Now that the first coating paint has hardened a bit, apply a second coating paint using the brush-in-cap gently but this time carefully refinishing the area to make it look good and professionally painted.

6. Don't let anybody use the tub, put warning sign if necessary and let it dry for at least overnight.

IMPORTANT:
When buying bathtub touch-up paint or tub resurfacing paint, make sure it is exactly the SAME COLOR as your tub. Touch up paint in home hardware stores usually have a sample circular paint finish right in front of the product label.
  
 
PICTURES:

1. Shake well the tub coating formula.
2. First coat.
3. Second coat.
4. Clean and white finish. After drying for 24 hours for best results.