Saturday, December 15, 2012

How to replace broken or damaged toilet seat and mount the new one


Broken or damaged toilet seats happen generally because of too much pressure, too much weight on the top of the toilet seat. Another possible reason is repeated "dropping" of the toilet seat as a result of not holding the seat while putting it down.

Below is a simple step by step procedure on how to replace your damaged or broken toilet seat and how to mount the new one.


Step by Step Procedure of replacing broken/damaged toilet seat:


1. Close the toilet cover. Open or remove the cover caps. In some models, there is no covering caps and you see the screw head right away.

2. Hold the bottom nut using a wrench or pliers then loosen the top screw using a Phillips (star) or flat screw driver depending on the screw head. If it is hard to loosen the nuts, you can spray some oil on the nuts, leave it for few minutes to penetrate and break the rust or dirt.

3. After removing the two screws, clean the dirt and stains from the old screw on top of the bowl.

4. Place the new toilet seat and position the two screws or bolts making sure the correct position of the washer. The washer should be placed with the flat side facing towards the bottom of the toilet bowl. Incorrect position of the washer may result in poor tightening or even breakage.

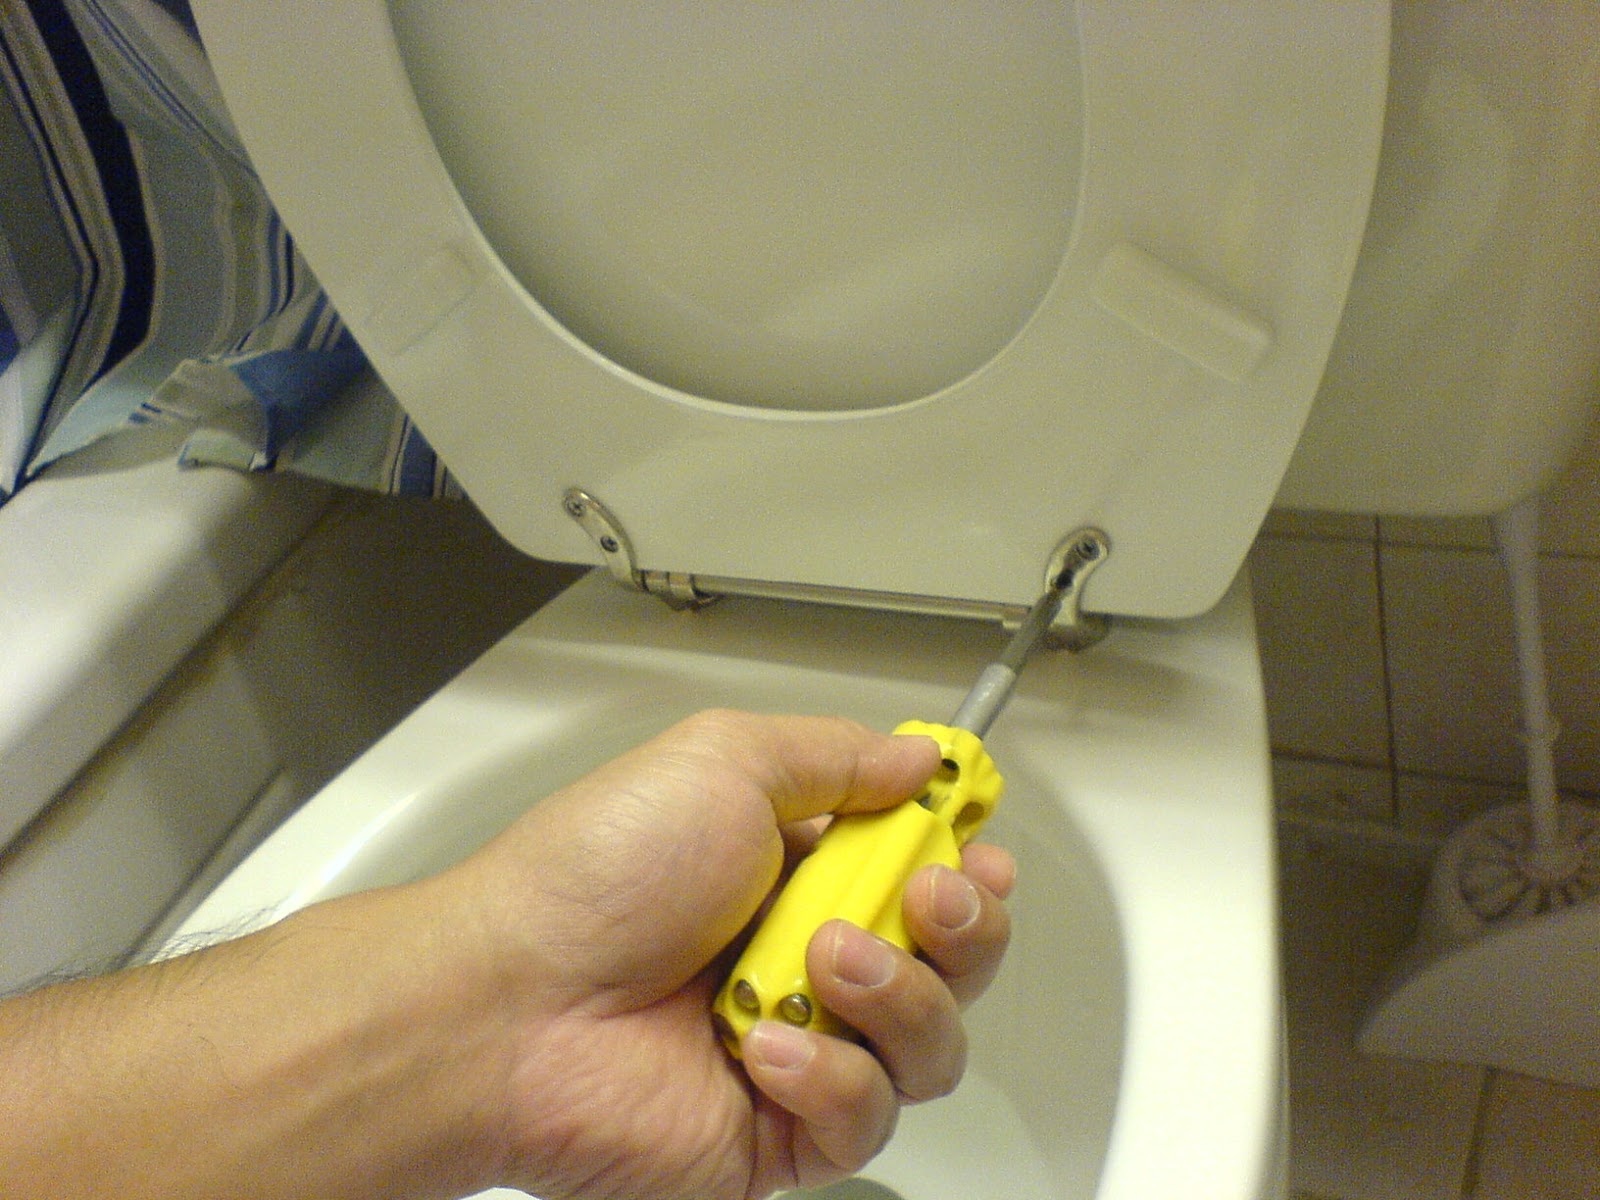
5. Tighten the bolts or screws using an appropriate screw driver while holding the bottom nut with your hand or with a wrench or with a plier as necessary.

Important: DO NOT OVERTIGHTEN THE NUTS. It may cause breaking of the toilet bowl including the hole for the bolt/screw. If the toilet seat shakes after several days or weeks, just re-tighten the nuts.

PICTURES:
                                                                   
Broken seat.

Tools needed.


Open caps.

Loosen two screws.
Clean dirt.
Clean before installing new seat.
Place new toilet seat.


Tighten two nuts with screw driver.
Tighten other screws inside.
Congrats! You have successfully installed your new toilet seat.

Tuesday, December 11, 2012

How to repair or replace a leaking or improper water splashing flow of a kitchen or lavatory sink faucet aerator


A leaking kitchen sink faucet aerator can be so uncomfortable while you are washing the dishes, washing the vegetables, fruits, or even a knife. Everytime you open the kitchen faucet, unnecessary splashing showers and even jets of water come out from a defective or dirty aerator. This can be caused by incorrect assembly of parts inside the aerator, broken circular  or ring screen, broken gasket, or a dirty aerator with debris blocking the flow of water, or any of the parts loose or damaged which causes it to malfunction and so affect the whole aerator assembly and thus causing it to leak or splash and producing an improper pattern of water flow.

A leaking lavatory faucet aerator on the other hand is as messy as a kitchen sink faucet aerator. When brushing your teeth and washing your mouth, the water flow can even splash or spatter right to your face and even your clothes, including the side tiles or even the bathroom floor. In any case, it is a mess and a discomfort.

Below is a simple procedure showing step by step instructions on how to repair a leaking or splashing kitchen sink or lavatory faucet aerator. The step by step procedure of replacing a defective or broken aerator is also discussed at the bottom.


How to repair a leaking or too much splashing of kitchen or lavatory sink faucet aerator:


1. Turn off both the hot and cold water faucet handles.

2. Using a monkey wrench or pliers, unscrew the aerator by turning it clockwise, loosen, and remove the aerator.

3. Check the component parts for any breakage, inspect any loosely fitted part in the assembly especially the black rubber circular or O-ring gasket and the small perforated (with many holes) circular screen for any dirt, debris, small grains of sand, etc.

4. If the aerator is dirty, clean all the parts removing even the stains. Fix any loose parts. Replace any broken part as necessary.

5. Assemble back the aerator component parts clean, snugly fitted, properly positioned in the correct order.

6. Put back the aerator assembly to the faucet by turning it counter-clockwise using your hands first, then tightening it using the money wrench or pliers.

7. Open the water handles to check the leak and water flow pattern. If the problem persists, follow the step by step procedure on how to replace a leaking, defective or broken kitchen sink or lavatory faucet aerator.


How to replace a leaking, defective or broken kitchen sink or lavatory faucet aerator:


1. Turn off both the hot and cold water faucet handles.

2. Using a monkey wrench or pliers, unscrew the aerator by turning it clockwise, loosen, and remove the aerator.

3. Screw into position the new faucet aerator by turning it counter-clockwise using your hands first, then tightening it using the money wrench or pliers.

4. Open the water handles to check the aerator if it is functioning properly and the water flow pattern is nice and smooth without any spatter or unwanted splashing showers and leaks.


Bathroom faucet with aerator.

Showing the aerator (with small openings) or perforations.


Sunday, December 9, 2012

How to repair bathtub or sink paint scratches, coating tears, black spots & refinish with resurfacing paint or touch up


A few years ago, a friend of mine spent more than $2000 dollars just for the replacement of her bathtub in the second floor bathroom. It started with a small 1/4 inch black spot which has been caused when an adjustable wrench fell down the bathtub while fixing the shower head. As a result, the bathtub paint was scratched and a paint coating the size of a small finger nail was torn down and thus producing the said quarter inch black spot. She did not repair it right away but left it as it is for several months until her daughter dropped a hard porcelain vase right on the same black spot on the bathtub. Unfortunately, this time the black spot turned into small black hole which caused leaking on the ground floor ceiling thereby producing those yellow water marks on the ground floor ceiling. This time she called a plumber to replace the bathtub costing her a lot of money because of the additional ceiling repair that has to be done.

If the small paint scratch has been fixed and refinished immediately with a resurfacing tub paint, this whole bathroom and ceiling expense could have been avoided. The good news is, fixing a tub scratch is as easy as painting your finger nails with a nail polish and another good news is that if the procedure of repainting your scratched tub is done properly, it could last for a few more years.

Below is the simple step by step procedure of re-painting a scratched tub:

1. Clean the scratched area.

2. Lightly sand the area, clean and make sure it is dry.

3. Before applying the touch up paint, shake it well.

4. Using the brush-in-cap, gently apply paint on the scratched area and leave it for at least half an hour.

5. Now that the first coating paint has hardened a bit, apply a second coating paint using the brush-in-cap gently but this time carefully refinishing the area to make it look good and professionally painted.

6. Don't let anybody use the tub, put warning sign if necessary and let it dry for at least overnight.

IMPORTANT:
When buying bathtub touch-up paint or tub resurfacing paint, make sure it is exactly the SAME COLOR as your tub. Touch up paint in home hardware stores usually have a sample circular paint finish right in front of the product label.
  
 
PICTURES:

1. Shake well the tub coating formula.
2. First coat.
3. Second coat.
4. Clean and white finish. After drying for 24 hours for best results.

Saturday, December 8, 2012

How to replace a kitchen sink or bathroom lavatory faucet


The procedure to replace a kitchen sink faucet and a bathroom lavatory faucet is basically the same. Kitchen sink faucets are generally bigger in size and sometimes include a sprayer consisting of a push button handle or trigger and an aerator. The working area for replacement in a kitchen sink which is under the countertop cabinet is wider and thus a little bit easier to maneuver and work with the tools. Some bathroom lavatory faucet models have a pop-up drain assembly which is an additional component to install but is optional.

If you call a plumber to replace your leaking, broken, or defective kitchen sink faucet or bathroom lavatory faucet, you might be charged a considerable amount of money. When your plumber does the job on a Sunday or holiday, extra charges may apply and would add up to your expense and cost of labor. On the other hand, if you have a little experience with plumbing or mechanical repairs, don't worry, as long as you have the right tools, understand basic repairing safety, do some research and read instruction manuals, you can replace your kitchen or washroom faucet by yourself alone.

In the following steps below, I tried to use clear, simple, and easy to understand procedures/instructions for the benefit of do-it-yourself (DIY) and home improvement replacement and repair practitioners and readers. I also included pictures to help visualize, better understand and correctly follow the instructions.


Step by Step Instructions How to Replace a Kitchen Sink or Bathroom Lavatory Faucet:


1. Tools needed to replace a kitchen sink or bathroom lavatory faucet.


2. The hot and cold water shut-off valves are located when you open the small door under the cabinet.

3. Water shut-off valves in the completely closed position (perpendicular).

4. Loosen the nuts on the pipe head using an adjustable wrench by turning it counter-clockwise.

5. Turn the monkey wrench counterclockwise to loosen the faucet attachment nut.

6. Top nuts loosened.

7. Loosen the bottom flexible pipe nuts by turning the adjustable wrench counter-clockwise.

8. Bottom nuts unscrewed.

9. The old lavatory faucet taken out and the flexible water pipes to be pulled out.

10. Put a strainer.

11. Clean surrounding areas of the top holes of the cabinet. Clean the flexible water pipes.

12. Old caulks and sealants, must be removed leaving a clean and flat surface for the new faucet.

13. Install mounting bolts.


14. Tighten mounting bolts.


15. Put new faucet flat and straight.


16. Put c-washers.

17. Check the position of new faucet.


17a. A close up photo showing the top end of the flexible water pipe.


17b. Close up picture showing the two threaded copper tubing at the bottom of the faucet assembly.


18. Insert the flexible water pipe in the copper tubing and tighten the top lock nut.


19. Flexible water pipe top nuts should be tight to prevent leaking. Be careful not bend or twist the copper tubing.


20. Insert the bottom ends of the flexible water pipe to the bottom copper tubes and tighten the nuts.


21. The bottom lock nuts should be tight to avoid leaking.

22. Photo showing the top and bottom connections.

23. Open the hot and cold water valves.

24. Turn the faucet handle to the left to test the cold water flow.

25. Turn the faucet handle to the right to test the hot water flow.


~Prinz Rhikxz~